Click on the screenshots to expand them for a better view.
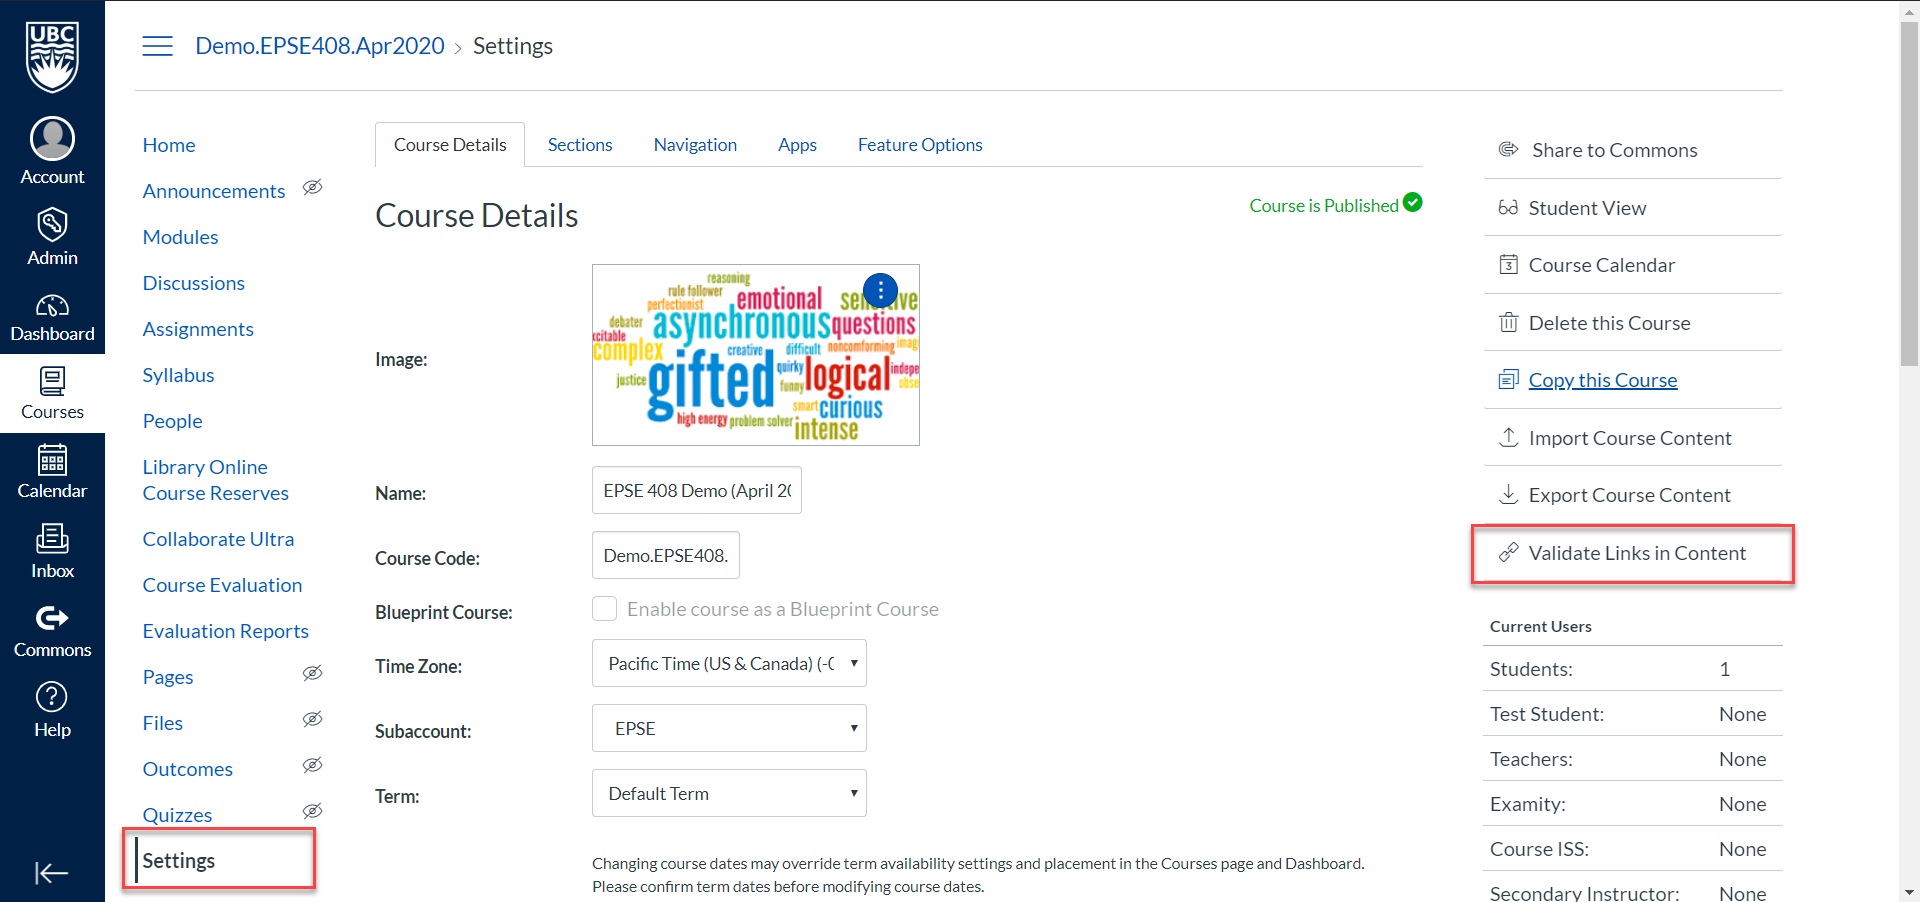
- Once you have uploaded or recorded a media using Kaltura, in order to make it visible to students in a specific course, you will have to publish it to the specific Media Gallery of that course. By default, the uploaded media will be private. Once you have saved the uploaded media, click on Edit in the pop-up shown below. You can also navigate to the media from My Media and from the Actions drop-down menu, click Publish.
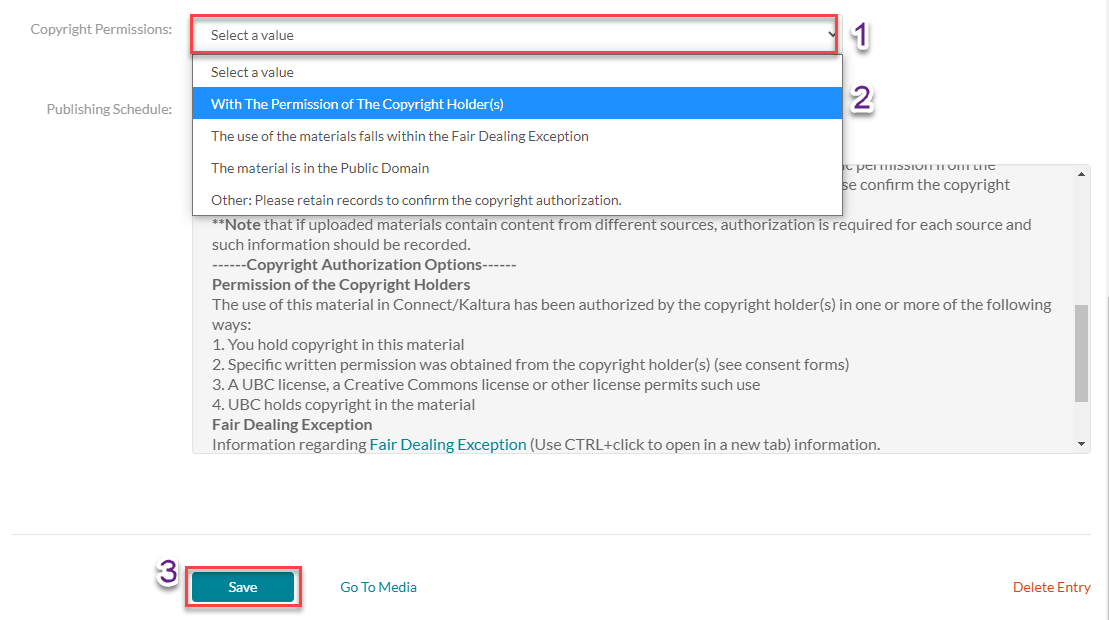
2. Scroll down the details of the media and select the Copyright Permissions drop-down. If you recorded the media yourself, select the With the Permission of the Copyright Holder(s) option, if it is a Youtube video or other public domain, select This material is in the Public Domain, then click Save. For more copyright information, please visit UBC’s copyright website. Once you have saved the copyright settings, click on Go To Media next to the Save button.
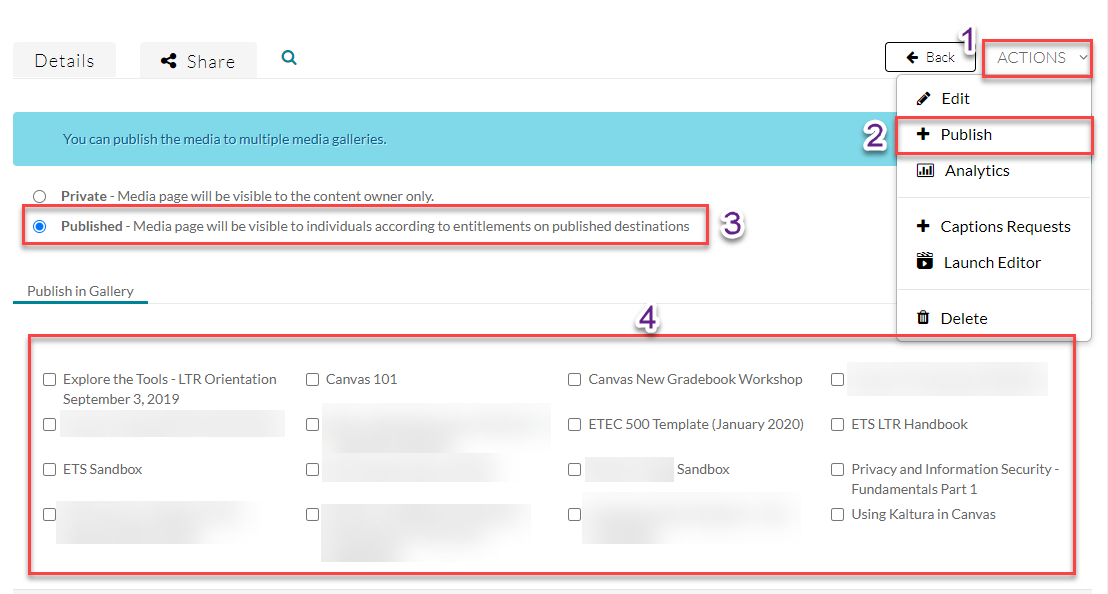
3. On the media page, click the Actions drop-down menu and select Publish. Then, toggle the selection from Private to Published as shown in step 3. A list of courses where you’re an instructor will appear and you can choose which course you would like the media to be published to. You can publish the media to multiple course galleries. Finish off by clicking Save.